Here they are! The last of the Valentine treats. These are going to join the other treats and journey 585 miles to my niece in Augusta, Georgia. These are so much fun. I must admitt, I struggled with the measurements (I am measurement challenged) and with alot of encouragement and help from my husband, finally got these right.
Special thanks to Laura for the tutorial, which you can find at http://justgivemestamps.typepad.com/my_weblog/ well worth the visit.
Feel free to email me with questions or comments, the email is ms.rhetta@verizon.net.
Ohh what a happy card! I loved making this. I recently purchased this cute set from Penny Black its a clear stamp set and I love the cutsey images! I paired it up with the “Happy” stamp and a little tag.
Recipe is simple. Card base is pretty in pink card stock and is cut to a standard size of 4 1/4 X 5 1/2″ finished.
Layer ontop of the pink card stock the swirley paper (Scraps from my scrap pile) and the green stripe, stamp the lamb and color as shown. Embellish with glitter. Layer lamb onto green cs, I used a paper pierce tool to create the little holes
I stamped the Happy and colored with water color pencils and a blending pen. It is finished off with a tag I die cut using my sizzix machine and the little flowers and buttons. I really like this, I think it is adorable.
Just looking at this card makes me happy.
Today I have a mess on my desk and around it, I don’t have much space in my stamping area, so I tend to let things pile up a bit and then clean them off. Its like a happy discovery every time.
I’ve also been working on these;
I’m going to ship them off to my niece in Augusta, Georgia later on this week. I’m also trying my hand at making the pencil boxes. So far I just can’t get the darn measurements right since the box isn’t folding quiet right. My dear DH assures me that with my (lack) of math skills he will be happy to sit down with me and do one of the boxes. I’m a kinda see it learn it kinda girl.
I hope today finds every one well. I had a happy surprise at lunch today. My friend Kris met me for lunch at the local Uno Chicago grill and brought me my Birthday and Christmas Presents. Wow, So many goodies, I can’t wait to go through them (again) and put every thing in its new home!
I’m still waiting (not so patiently) for my Scor-Pal to arrive, I hope it lives up to its reputation! I am looking forward to receiving it soon!
It is very cold here in Maryland. So far our local area is lucky, we haven’t really had any accumulation of snow today. A few flurries and that is about it.
Today I have been working on some Valentine ideas. These minature pillow boxes by Sizzix are actually usable. The one’s in the picture are empty, however they can easily be filled with candy, or maybe even a few small clear stamps. I discovered it is best to use the crease dye with this box and to use good quality CS (I recommend Stampin Up) otherwise you will have problem with the ends splitting. I also recommend using that red liner tape to hold them closed. Otherwise they tend to pop open.
I am so ‘re in love’ with my sizzix Big Shot (it is the same machine as the big kick) and totally in love with the new embossing folders from Cuttlebug.
In the sample cards you see above, I used the Sizzix Scallop punch for the ‘best friend’ saying, a small clip is attached above the two girls using E6000 glue.
The background is embossed with the cuttlebug embossing folder. There is glitter randomlly placed on the card. The hearts on the minature pillow boxes are also a sizzix bigz die.
Happy Stamping, don’t hesitate to email me if you have any questions!
Before I tell you about my happy discovery, the card above was made by sending a piece of vanilla card stock through my Big Shot machine using a cuttlebug embossing folder, it was then colored with sparkly pebbles chalk. I used a light coat of “make it last” sealer to insure the chalk would not rub off,
Then I used a scrap of patterned paper and folded the heart, attached it to a contrasting piece of pink card stock and created a matt for it using my sizzors. Then the ribbon was added and the tag (Stampin Up) was also added.
I’ve been working the last two days for items for www.sparklensprinkle.com, Margaret now has a sister store in California and all of her designers (including me) have been busy little ‘elfs’ stamping up a storm for this project. My box will be finished up and in the mail tomorrow. Check out her stuff online, be sure if you buy her products to let her know ‘Loretta’ sent you!
So now to my happy discovery.
I don’t know about you guys, but over time those acrylic blocks we used to stamp our Unmounted stamps, well — they get mucked up. They get cloudy, dirty, stained with Staz on and just plain mucky.
Try this, stick them in the dishwasher, yupper dishwasher. When the cycle is done, take them out, any remaining gunk or staz on is easily removed using un-du Adhesive Remover. I put alittle on the most stained areas let it set a few seconds and wipe off with a clean (old terry) rag. Repeat until all stains are gone. If it is still a little ‘cloudy’ clean it one more time with good ol’ fashioned windex. The results are simply stunning. They look brand new!
I have been anticipating the release of Scrap and Stamp Arts April 2008 issure for a while now. I’m pretty sure my “Never Ending Card” will be published in this issue.
Here are the instructions:
Happiness is Friendship (Never ending Card)
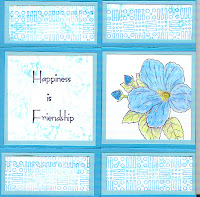
Stamps
All Stamps Sparkle N Sprinkle
Flowers Plate 210 flowers
Plate 234 flowers
Plate 270 flowers
584-260C spring daisies
Plate 258 Valentine heart
Bars & circles border 1543-303K
Tiptoe the tulip 815-271A
Card Stock
Coral light
Teal
Basic Blue
White
Other
Sizzix Die Flower Power #2
38-0989
Embossing Tape 99538
Sparkle N Sprinkle
Crystal 3-D Lacquer Craft store
Glitter G1038 Sunny Daze
Sparkle N Sprinkle
Crinkled paper I used a old grocery receipt
Double sided tape
Teal dye ink dark and light
Watercolor pencils
Blending Pen
Buttons
Glue
Card Construction
1. Cut 3” X 6” pieces card stock.
2. Score at 1 ½” from both ends and fold toward the middle.
3. Crease these two pieces thoroughly, unfold and re-crease from the opposite side.
4. Place two pieces horizontally on work surface.
5. Place the other two pieces vertically on top of the first two pieces. Make certain that all outside edges match as closely as possible. * It is important that the crease lines match.*
6. Carefully adhere the common corners of all four sides, use the strong embossing tape.
7. Card construction is now complete.
8. Be mindful to plan the placement of the stamped images or photos before actually putting them in place, because the opening of the card reveals another area. It is very important to plan carefully!
To continue you will need
• Ten 1 ¼” X 2 ¾” pieces of light blue card stock.
• Twelve 1 ¼” square pieces of light blue card stock.
• Six 2 ¾” square pieces of light teal card stock.
• Ten 1” X 2 ½” pieces of white card stock
• Twelve 1 ¼” square pieces of white card stock
• Six 2 ½” square pieces of white card stock
FRONT
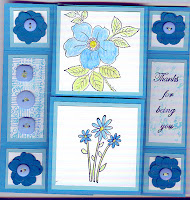
1. Stamp and color border and flower images.
2. To create texture, crumple up a piece of paper, dab into light lavender ink and then apply to the paper.
3. Adhere.
FIRST FLIP
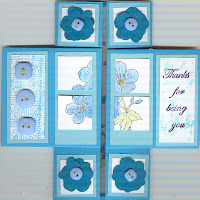
1. Stamp and Color flowers as shown.
2. Cut out sizzix flowers and apply to card front, embellish with glitter.
SECOND FLIP
1. Stamp images from valentine plate and adhere.
2. Stamp tulip over border and adhere, cover with crystal lacquer and let dry.
3. Stamp sentiment and adhere.
4. Apply sizzix flowers and adhere, embellish images with glitter.
BACK
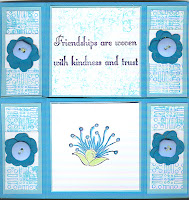
1. Stamp images and Color, apply crystal lacquer to tulips and embellish the flower with glitter.
Complete instructions for this may be viewed on the web at www.hgtv.com it was featured on the Carol Duval Show, Episode CDS-1452. This is my version of the card using the Sparkle N Sprinkle designs.