Isn’t this a beautiful pin? I know I have posted other pins similar in nature but they have had one problem until now I haven’t been able to overcome, the darn wings wouldn’t stay on.
I tried everything, I tried super glue, I tried red liner tape, regular glue, rubber cement, regular glue, crystal effects. A big fat ETC., here.
So I had an “ahh haa” moment. Why not try floral wire. It worked like a charm.
So here is my tutorial.
Butterfly Pin
Supplies:
Butterfly stamps from Starving Artist Stamps
3M Multipurpose transparency Film
Black detail Embossing Powder Ranger SFJ09993
Anti Static Bag
Galaxy Markers, Paint pens or Sharpie markers
Small Pin backs
24 gauge floral wire
V ersa Mark Stamp Pad
¾” Pin back
Instructions:
1.Make sure your hands are clean and free of any excess oil. Finger prints will show on your final project.
2.Go over transparency front and back with the anti static bag.
3.Stamp butterfly image onto the same side of the transparency that would go through the printer to receive an image, I used Versa Mark ink. Generally I place a dark card stock under my project otherwise it is difficult to see the butterflies on the transparency.
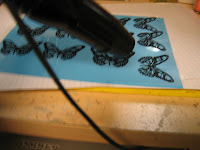
4.Cover with black detail embossing powder, shaking off excess. Then carefully begin to heat emboss the images. I was able to get about 10 small butterflies (five pins) out of one sheet of the transparency.

5.Color from the opposite side that you stamped on with either sharpie markers, paint pens or galaxy markers. Set aside until fully dry. This process generally takes about 20 minutes.

6.Once the butterflies are dry cut them out using sharp small pointed end scissors. On one of the sections, remove the butterfly head and antenna. Separate the wings at the middle.
7.Using a single drop of superglue adhere the top and bottom section together.
8.Using a single drop of superglue adhere the pin back to the back. I used a black marker so you do not see the pin back from the front.
9.Using a small craft awl, poke two tiny holes through the two butterfly layers, insert the 24 gauge form the top of the butterfly through the pin back. I used needle nose pliers to twist the wire together and bring the wire up from the bottom to form the antenna. I curled the ends using the awl. Color any wire the same color as the butterfly, it will disappear!

This is not a difficult project. It does take some time and patience. I hope you too will create a heard of butterflies! Please email me with any comments or questions. I will include a butterfly in the Blog Candy! Stay tuned, blog candy will be updated on Wednesday!